HOW TO INSTALL MINT LINUX

BY.MICKY VERMA
Linux Mint is a modern, polished, easy-to-use and comfortable community-driven GNU/Linux desktop distribution based on the popular Ubuntu Linux distribution. It is a great and recommended distribution for computer users switching from Windows or Mac OS X operating system to the Linux platform.
Last week, the stable release of Linux Mint 18 code named “Sarah” was officially announced by the Linux Mint development team and users are ready to upgrade to the new version. Unlike its predecessor Rosa, which was based on Ubuntu 14.04 LTS Trusty Tahr, Sarah is based on Ubuntu 16.04 LTS Xenial Xerus.
Importantly, Linux Mint 18 is a long term support (LTS) release to be supported until 2021 and comes along with several updated software, improvements and some new features and these include:
- Linux Kernel 4.4
- Ubuntu 16.04 package base
- Cinnamon 3.0 and MATE 1.14 desktops
- MDM 2.0
- X-apps
- Update manager
- Mint-Y plus many more
Upgrade from Linux Mint 18 Beta to Linux Mint 18 Stable Release
For users who have been testing the beta release of Linux Mint 18, you can now upgrade to stable release as follows:
In the system Menu, search for Update Manager and launch it, then click on the refresh button to apply any level one updates.
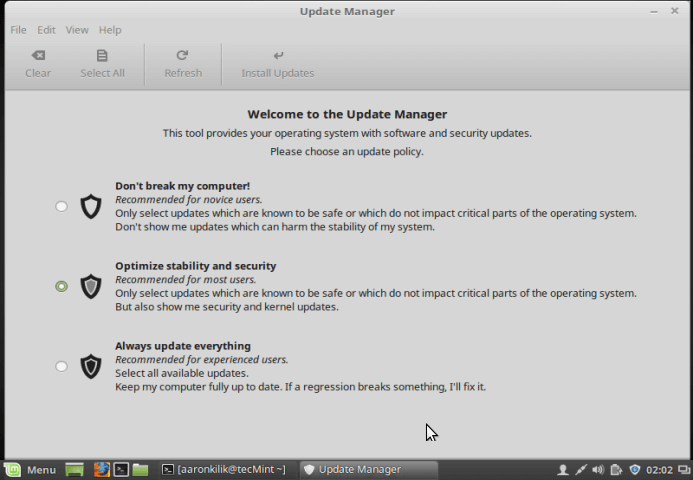
Update Linux Mint 18 Beta to Linux Mint 18 Stable
Note: In the stable version, samba package was removed, because it slowed down the boot process. To remove samba from your system, use the command below:
It will also be possible to upgrade from Linux Mint 17.3 to Linux Mint 18 Sarah, but the upgrade instructions will be available next month.
For Fresh Linux Mint 18 installation, go through these instructions to install the latest version of Linux Mint on your machine. Same instructions also apply for both Cinnamon and Mate desktop installations.
Download Linux Mint 18 ISO Images
First of all, you need to download the ISO image from the links below:
- Cinnamon Desktop: 32-bit – 64-bit
- MATE Desktop: 32-bit – 64-bit
- Create a bootable media using Unetbootin or dd Command
Installation of Linux Mint 18 Sarah
1. After creating a bootable media, insert into a working USB port or DVD drive and boot into it, then, after a few seconds, you should be able to see the screen below and finally a live Linux Mint 18 desktop.
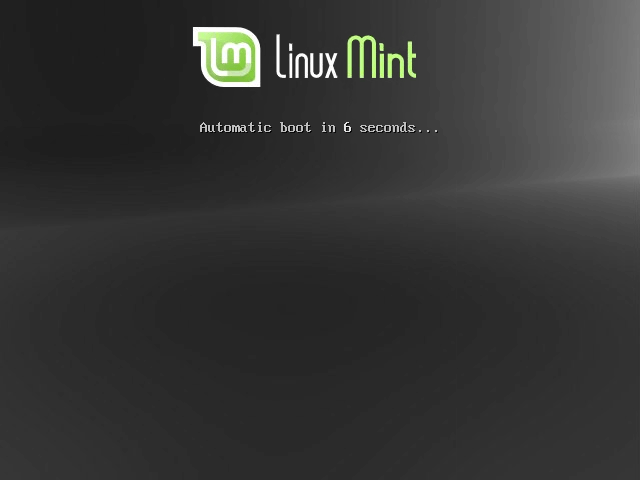
Linux Mint 18 Boot Screen
Double click on “Install Linux Mint” installer icon to start the installer.
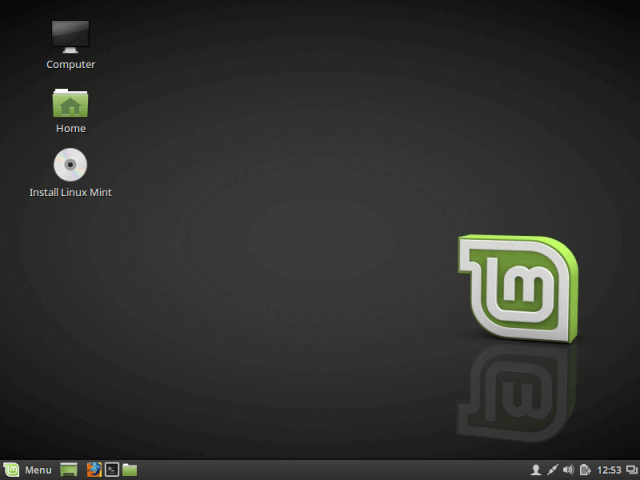
Click on “Install Linux Mint” Icon
2. You should be at the welcome screen below, select the installation language and click on “Continue” button.
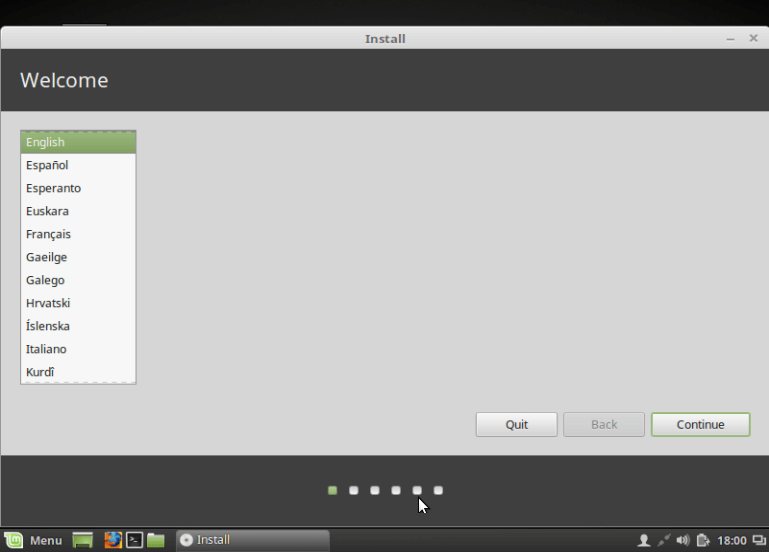
Select Linux Mint 18 Installation Language
3. Then prepare to start the actual installation process, you can check the check-box in the screen below to install third-party software for graphics, Wi-Fi hardware, flash, MP3 plus many other media. After that, click on the “Continue” to proceed.
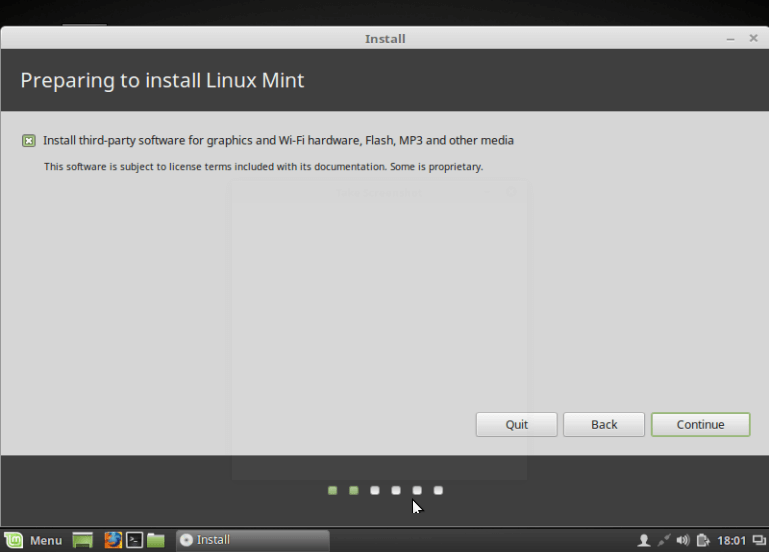
Select to Install Third-party Software
4. Then, select the Installation type as follows, to perform manual partitioning, select “Something else” and click on “Continue” to proceed.
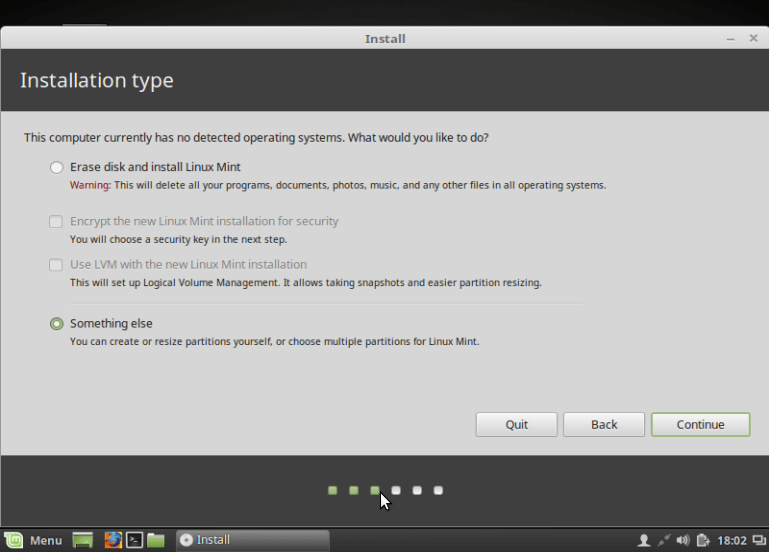
Select Linux Mint 18 Installation Type
5. You will have to do a manual installation disk setup. To perform a manual partitioning scheme, click on “New Partition Table”.
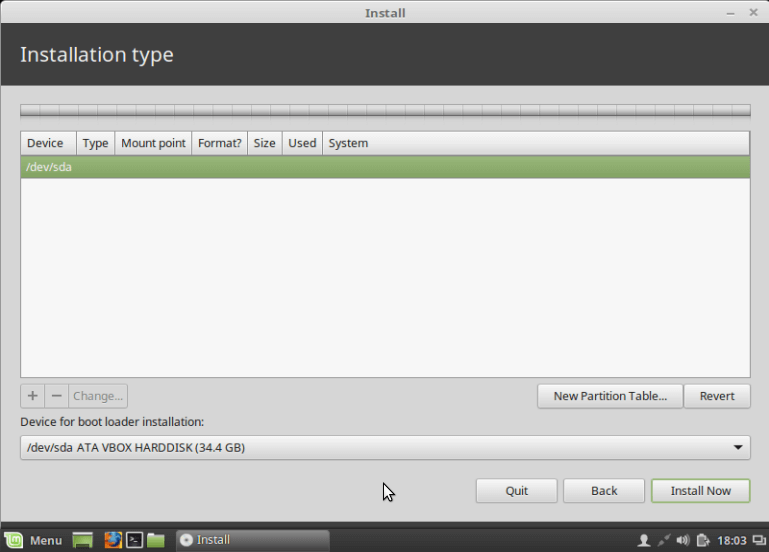
Select New Partitioning Table
6. Next, click “Continue” on the dialog box in the screen below to set up a new empty partition table on the hard disk you have selected.
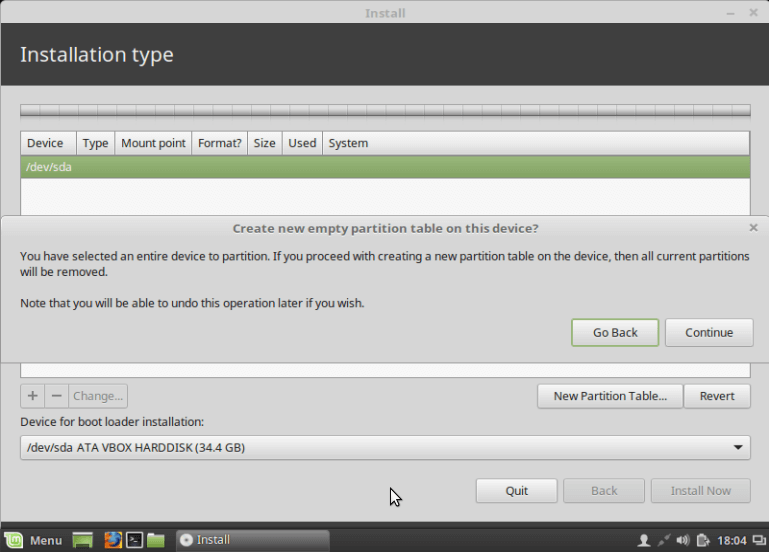
Create New Partitioning Table
7. Then double click on “free space” that has been made available on the hard disk to create new partitions on the hard disk.
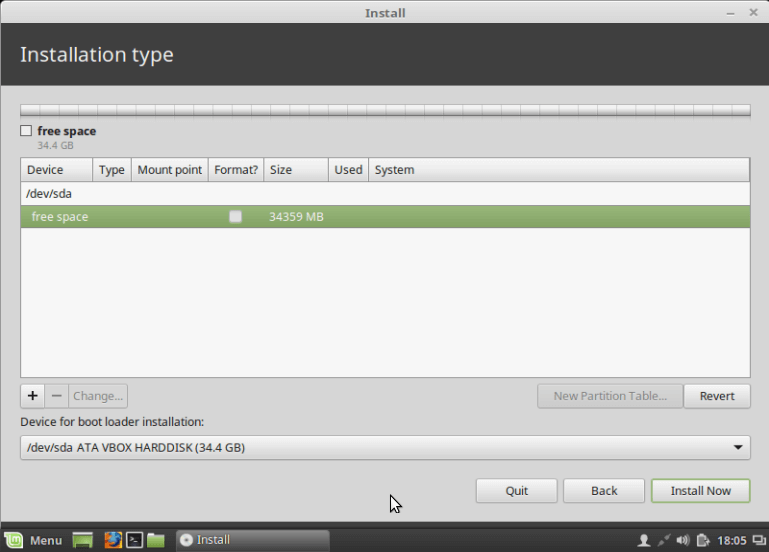
Create New Partitions
8. From the screen above, click on the
“+” button to create the root partition for your Linux Mint 18. You will see the screen below and enter the following parameters and click “OK”.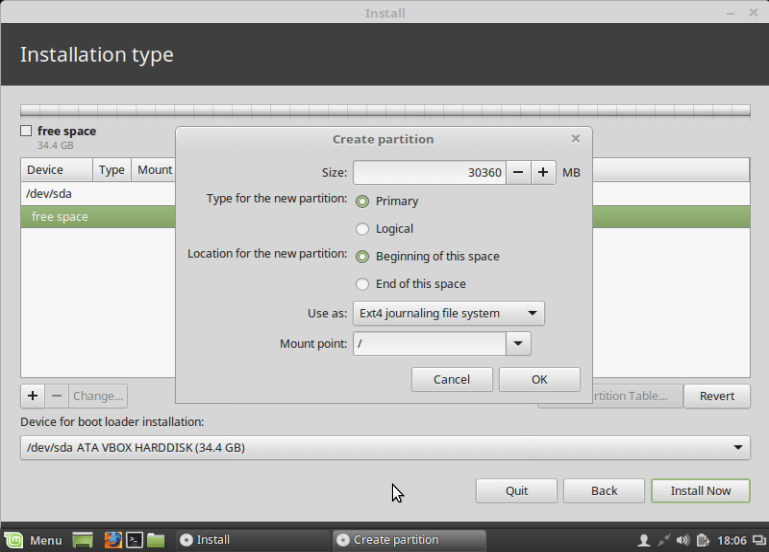
Create Root Partition
9. Next, create a
swap partition which is space on your hard disk that temporarily holds data not actively being worked on by the system from RAM.To create the swap space, click on the
“+” sign, enter the parameters as in the screen below and click “OK”.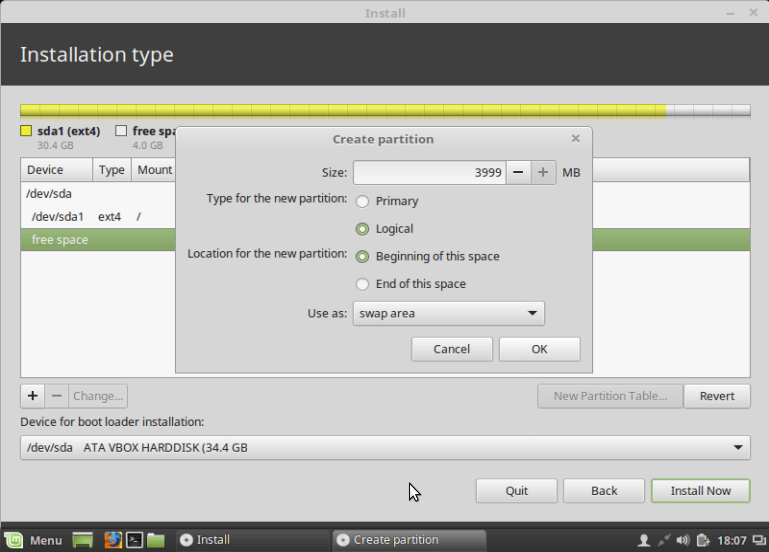
Create Swap Partition
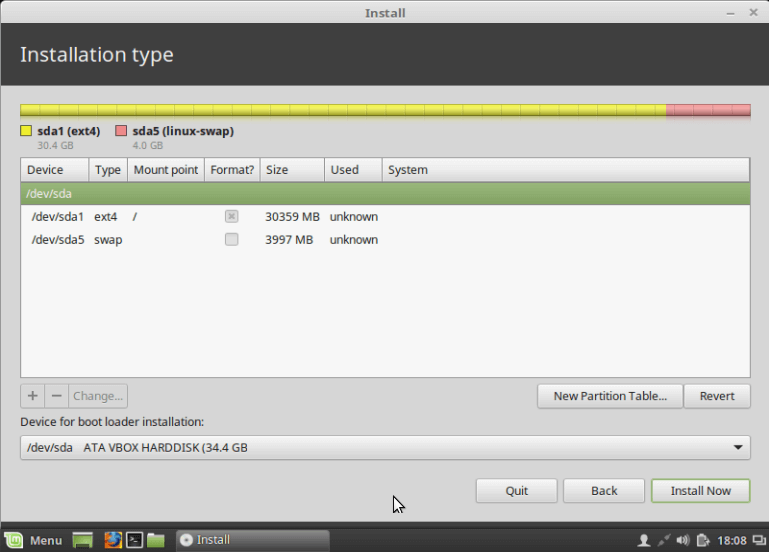
Partition Table Summary
10. After creating all the partitions, click on the “Install Now” and Click on “Continue” on the dialog box below asking you to confirm the partitioning scheme you have set.
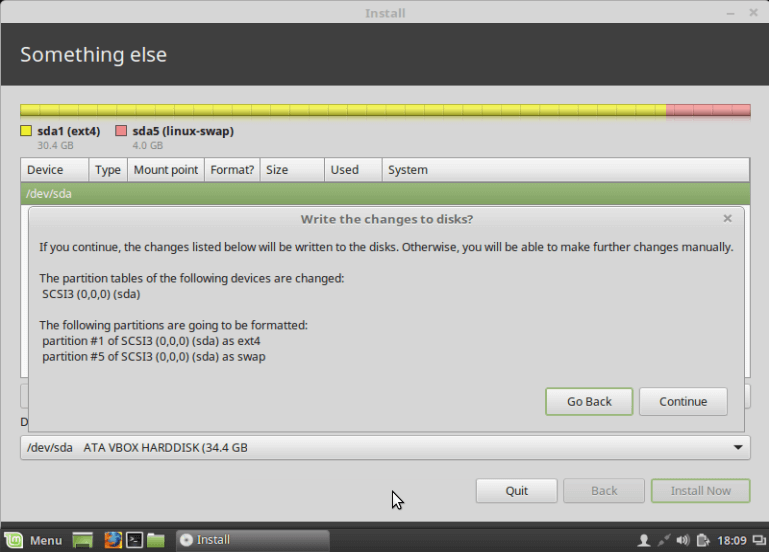
Confirm Write Changes to Partitions
11. Select your country location from the screen below and click “Continue”.
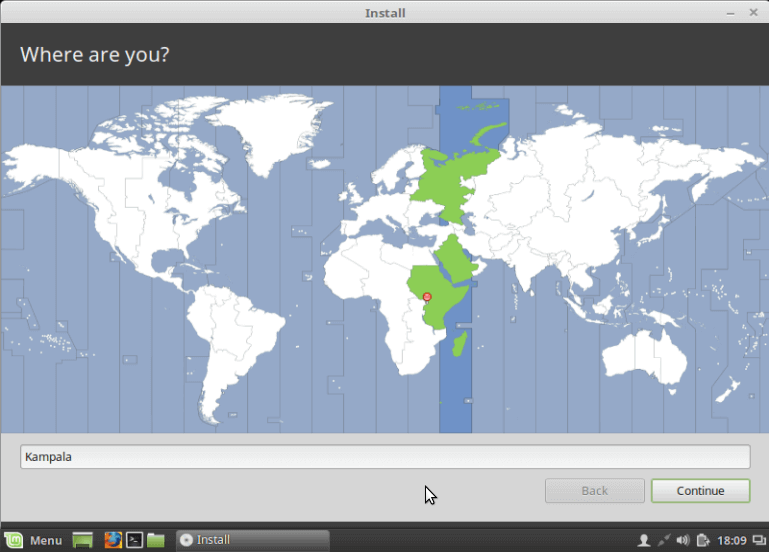
Select Country Timezone
12. Next, select your default Keyboard Layout and click “Continue”.
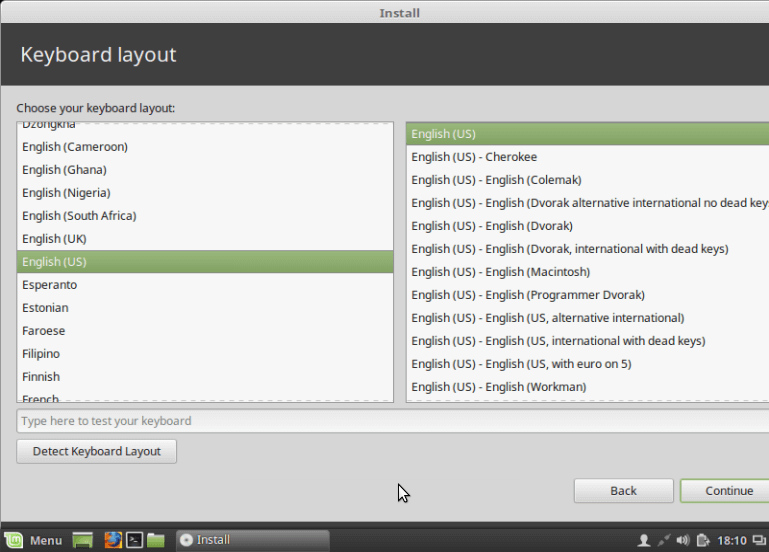
Select Default Keyboard Layout
13. Now it is time to set up a system user account. Enter the your full name, computer name, a system user name and a good password. After that, click on “Continue”.
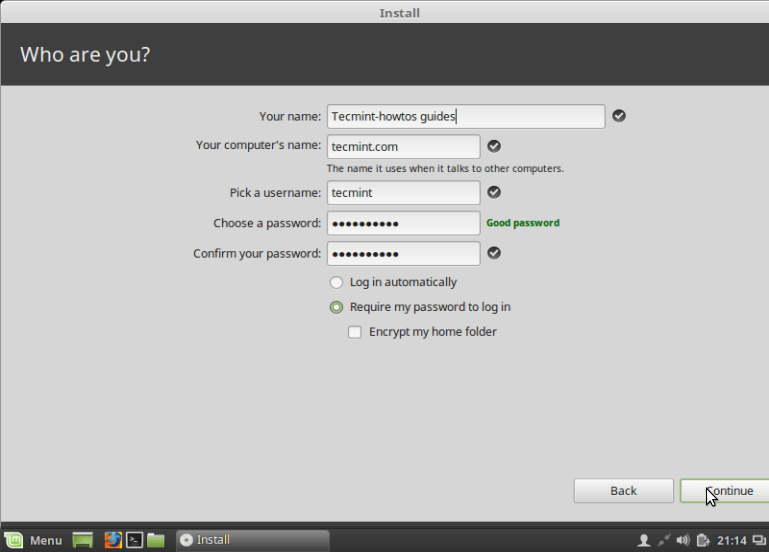
Create New User Account
14. The actual system files will now be installed on your root partition as in the screen below.
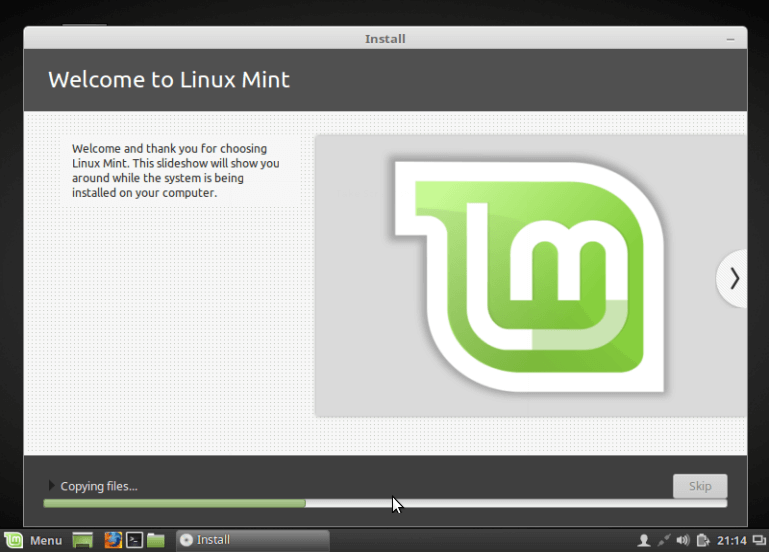
Linux Mint 18 Installation Progress
Wait until the installation process is complete, you will see the dialog box below, remove the installation USB/DVD and then, click “Restart Now” to reboot your machine.

Linux Mint 18 Installation Complete
15. After rebooting, you will see the screen below, click on the username on the screen and enteer your password to login into Linux Mint 18 Cinnamon desktop..
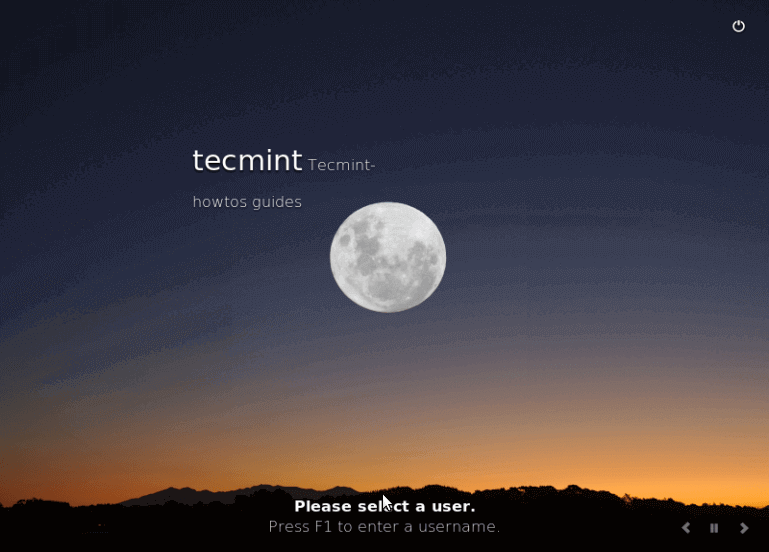
Linux Mint 18 Desktop Login Screen
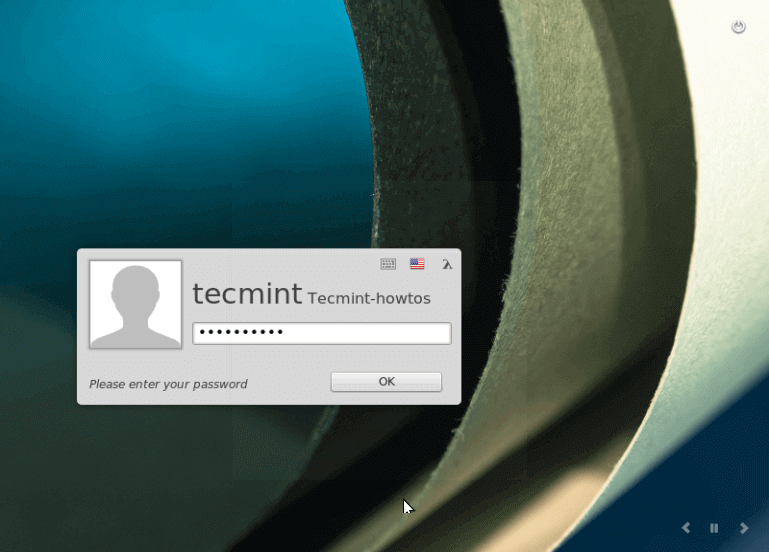
Linux Mint 18 Login Screen
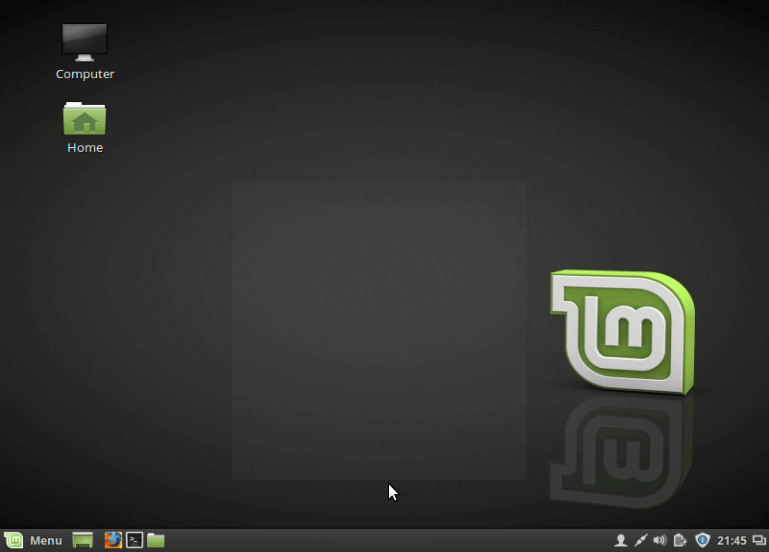
Linux Mint 18 Desktop
Hoping that everything went on well..,
If you like This Post Please Commets & Share...,
No comments:
Post a Comment